- PREVENT SCALE AND PROLONG THE LIFE OF YOUR SEALS IN YOUR HEATER! GRAB A BOTTLE OF NO SCALE
- order parts before 1pm for next day uk delivery
How To Find & Fix Water Leaks in Your Lay-Z-Spa
Complete Leak Detection Guide
If your Lay-Z-Spa is losing water, don’t panic.
Most water leaks are caused by worn seals, loose connections, or simple component wear — not major liner damage.
This guide will help you locate the source of your leak before booking a repair.
Step 1: Check the Connection Coupling Seals (Most Common Cause)
The first place to check is the connection coupling seals.
These are the rubber seals inside the A and B pipes that connect the heater pump unit to the spa liner.
Inspect the seals carefully:
Are they brittle?
Cracked?
Flattened?
Misshapen?
Hard instead of flexible?
If the seals feel stiff or brittle, they are no longer creating a watertight seal and will need replacing.
In most cases:
👉 If one seal is brittle, the others will be in similar condition.
Instead of replacing just one, a full seal refurbishment kit is recommended to prevent future leaks.
You can find replacement seals and full refurbishment kits in our online store.
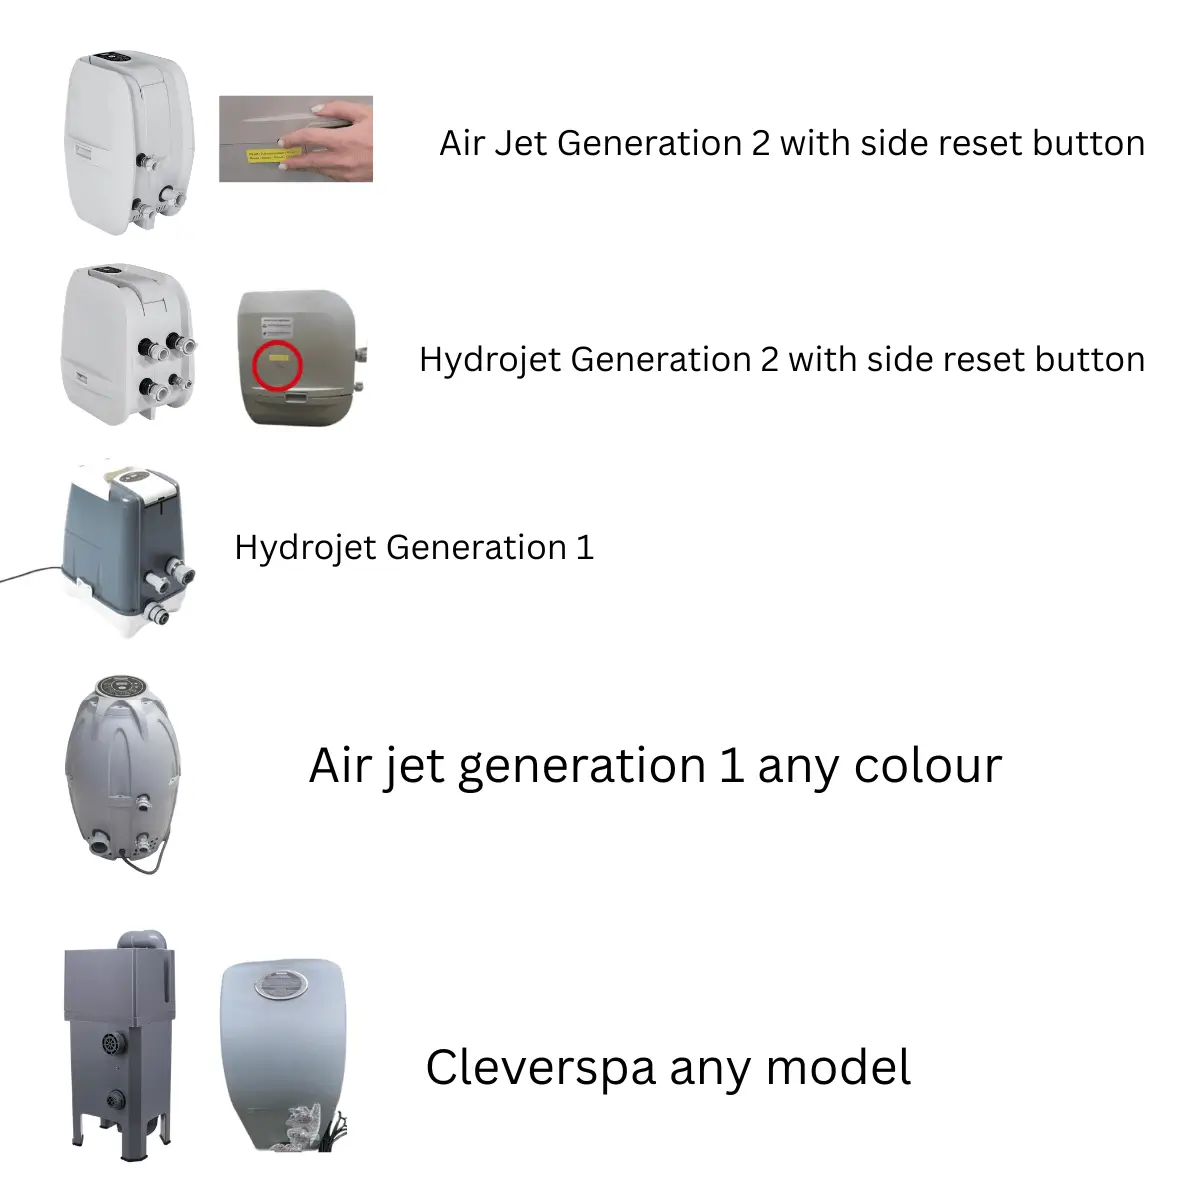
Step 2: Check the AirJet Non-Return Valve (AirJet Models Only)


Hot Tub & Pool Test Strips 3-in-1 – pH, Chlorine & Bromine | Prevent Scale & Heater Damage | 100 Strips
£9.99 incl VAT [UK]Perfect for Lay-Z-Spa, CleverSpa & MSpa owners.

Fix E02 errors, leaks and low water flow with upgraded heater seals, flow paddle and pump components. Includes step-by-step video guide for easy DIY repair.
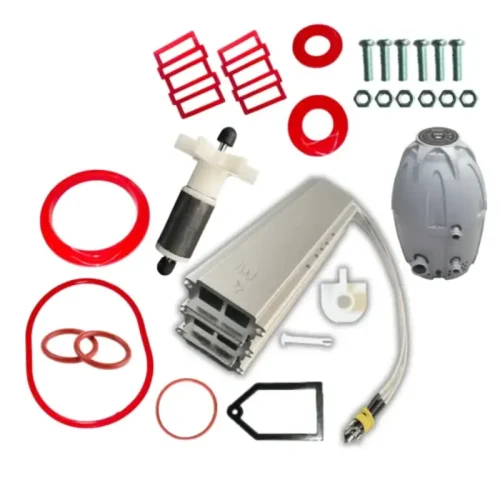
Lay Z Spa Egg AirJet Complete Refurbishment Kit – Full Internal Pump & Heater Rebuild
Bring your Lay-Z-Spa AirJet pump back to like-new condition with this complete internal refurbishment kit.
This kit replaces all major internal wear components, including the PTC heater core, heater seals, flow paddle, seals, impeller bushes and more.
Perfect for spas suffering from E02 errors, weak heating, water-flow issues, noisy pumps, or RCD tripping when the heat button is pressed.
✔ Fits Egg Style Lay-Z-Spa AirJet models
✔ Includes new heater core + 2× red heater seals
✔ Full internal rebuild kit with step-by-step video guide
✔ Fixes E02, weak heat, low flow, pump noise, sensor faults & RCD trips

Restore your Lay-Z-Spa HydroJet heater pump with this complete refurbishment kit designed for 2021 onwards models.
This service kit helps fix common issues such as E02 error codes, water leaks, slow heating, black flakes in water and heater tripping problems caused by worn impeller shafts, degraded seals or heater element faults.
The kit includes a new heater element with silicone seals, impeller shaft with bushes, water flow components and all essential pipe seals, allowing you to service your heater pump at home using basic tools.
Ideal for keeping your spa running efficiently and avoiding costly pump replacements.

LayZrepair No Scale & Stain | Prevent Limescale, E02 Errors & Heater Tripping
If you have an AirJet model and water appears near the air system:
Look inside the liner connection pipe for the non-return valve.
If this valve is:
Missing
Damaged
Warped
Water can backflow into the air system and cause leaks.
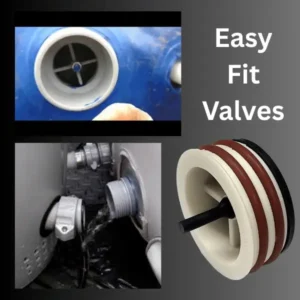
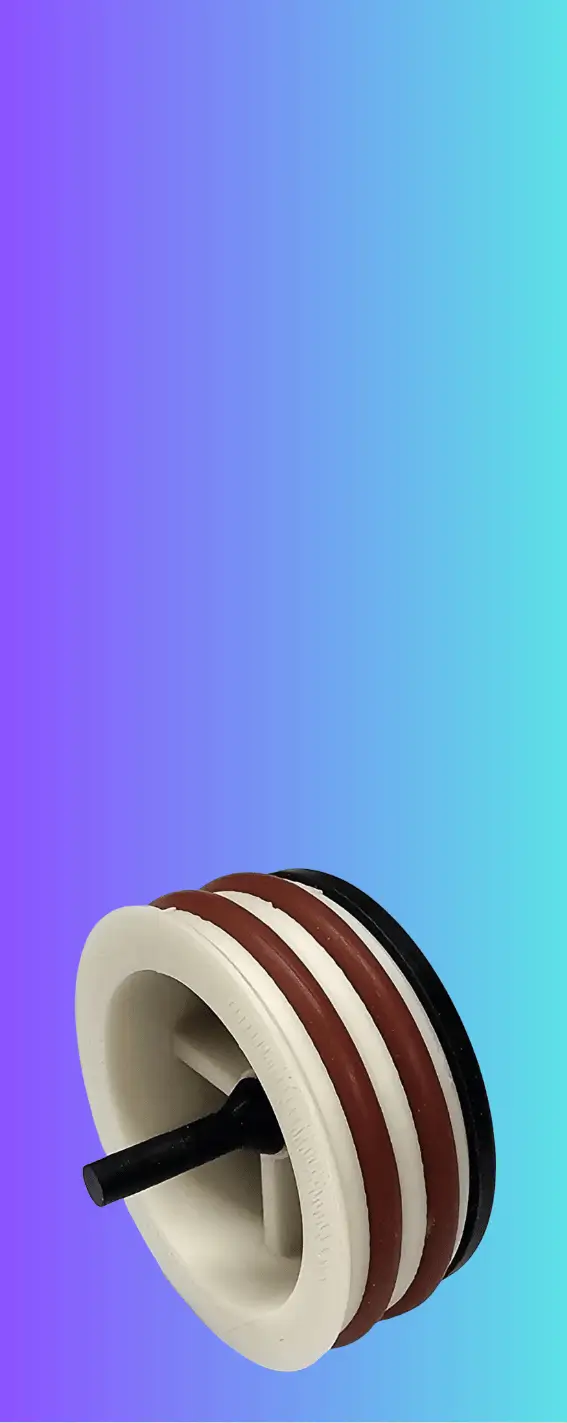
If missing, install an Easy-Fit Non-Return Valve, available in our store.
This is a very common and simple fix.
Step 3: Inspect for Internal Pump Unit Leaks
If external seals look fine and water is coming from the pump unit itself, you may have an internal leak.
⚠️ Always disconnect power before opening the unit.
How To Locate an Internal Leak
Disconnect the power completely.
Remove the outer casing.
Carefully tip the internal assembly onto its back.
Fill the small water flow pipes with water.
Do NOT fill the air blower pipe.
The air blower pipe does not circulate water.
By filling the internal water system, you can see exactly where the leak originates.
Common internal leak points include:
Heater chamber seals
Flow switch seals
Pipe connection seals
Pump housing seals
This method allows you to visually confirm the exact source of the leak.
What To Do Once You Find the Leak
Once you’ve identified the leaking seal or component:
Replace the specific seal from our website
Or upgrade to a full refurbishment kit if multiple seals show wear
If you’re unsure:
📸 Take a clear photo of the leak location
📩 Contact us with the image
We’ll advise you on the correct part.
When To Consider a Full Service
If:
Multiple seals are brittle
The unit has never been serviced
There are several small leaks
Internal corrosion is visible
A full professional service may be the most cost-effective option.
In many cases, servicing the unit is far cheaper than replacing it.
Important Leak Diagnosis Tip
Before dismantling your pump:
Make sure the water loss isn’t:
Evaporation (especially in hot weather)
A loose drain cap
A damaged liner puncture
A poorly seated filter housing
Always rule out the simple causes first.
Need Parts or Professional Repair?
We stock:
Coupling seals
Easy-Fit Non-Return Valves
Full refurbishment kits
Internal pump seals
Replacement heater components
Or you can book a collection and let us fully diagnose and repair your unit.
Stop E02 errors, limescale build-up & heater damage
Get £1 Off No Scale Today
Join now and get £1 off our No Scale & Stain treatment — protect your Lay-Z-Spa and avoid costly repairs. Your discount is applied instantly.
Archives
Categories
Need Help?
Monday – Friday: 9:00-17:00
Saturday: 09:00 – 15:00
Sunday: 10:00 – 16:00
VAT number: GB 510493517
Customer Service
- If one seals is perished, then grab a service kit to replace all your seals.
- Give your Lay Z spa heater pump machine a complete overhaul
Copyright 2026 © LayZrepair


